Basic Sound Board Usage
Turning On The System
Click the big red button at the bottom of the rack next to the sound board. This will turn on the sound board, amps, and the stage box.
Event Preparation
If using microphones
Click the gray sennheiser button in the middle of the rack. This will turn on the mic receivers.
The microphones are in a case under the sound board. Replace the batteries with new ones from the charger. The handheld mics you unscrew the bottom, and the lapel mics you open the front. If you are using the red microphone, you MUST use the EBL 2300 batteries, or it will not turn on.
If Using Instruments
Instruments can be plugged into smaller snakes on the stage or directly to the stage box on the side of stage left. To make things easier, it is best if you plug the instruments into the sockets that are already patched for them on the board. a current list can be found on the Sound Input List.
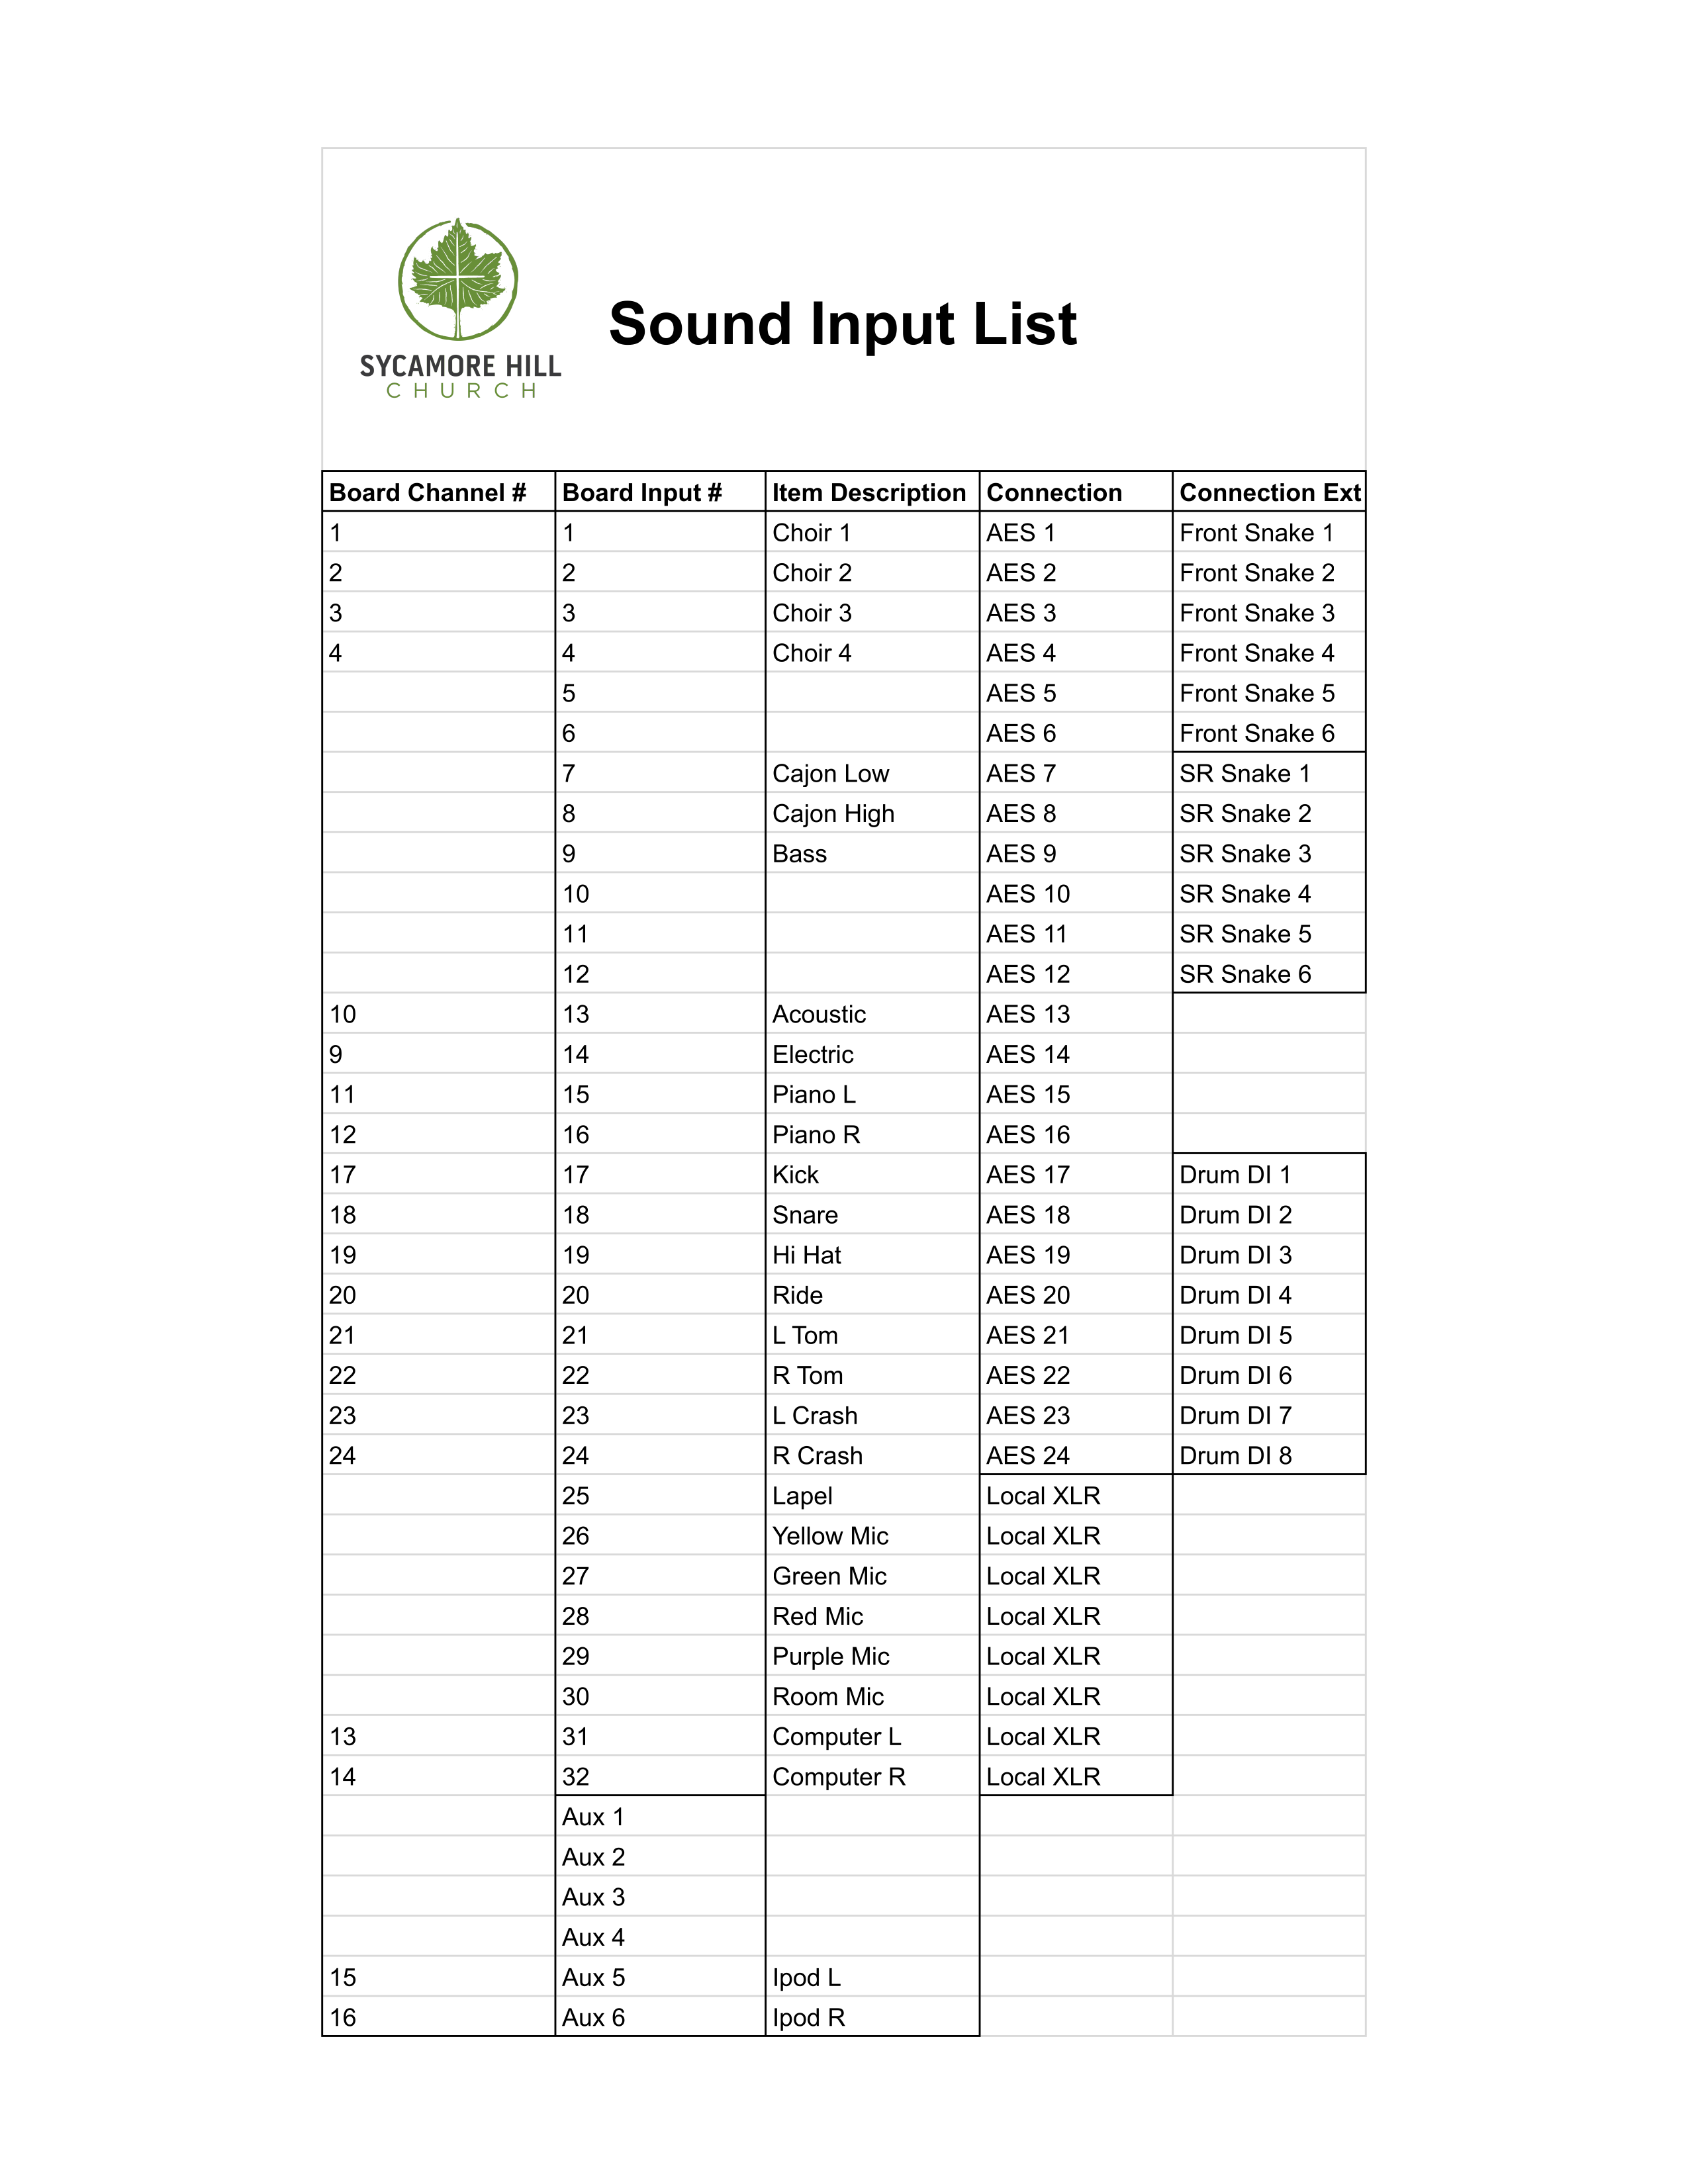
If Livestreaming or Recording
Hit the record button on the recorder on the rack. Currently this is set as the passthrough to streaming, and so it needs to be in the ready state for sound to go to streaming. Make sure to hit this again at the start of service to start the recording.
Using the Sound Board
Take the cover off if it is not off already.
Layout
On the left side are channels. You can change pages by hitting the buttons on the far left. They are organized into groups of channels for ease of finding things.
| Layer 1 | |||
|---|---|---|---|
| Lapel | Mics | Instruments(except drums) | Line Inputs (ipod, computer) |
| Layer 2 | |||
| Room Mic | Choir Mics | Spare Channels | Drums |
On the right side are the group controls. In general, for most use cases you can stay on the DCA layer on top.
DCAs
DCA are grouped volume and mute controls, and are on the right side of the board. For example, if you have all the microphones at a good level relative to one another, but want to turn them all up, it is very difficult to make the relational volume changes to all the channels at the same time and still have it sound correct. DCAs automate this for you, and you can use this instead to control all those channels at once.
They also can act as mute groups, and more on this in a moment.
Turning on Channels
Un-Muting
It is best to only have the channels you will be using unmuted. The order of muting is that hard channel muting takes precedence over group muting. This will allow you to hard mute channels not used at all in a service, but be able to group mute and unmute all the channels of one type during the service itself.
If the mute button is hard red
This means the channel control itself is muted. Hit the mute button to take off the hard mute on that channel. This MAY still leave the channel muted, but flashing, and in that case continue to the next step.
If the mute button is flashing
This is a group mute. Click the mute button over the DCA that controls that group to unmute the channels. Note that the drums are included in both instruments and drums for volume control and ease of mute purposes.
Setting Levels
Generally, sound will be acceptable with only changing the gain and the volume sliders. EQ you can choose to change, but is not required. Most times, compression and other settings can be ignored unless you are intimately familiar with the board.
Setting Gain
Before you can correctly set the volume slider, the gain needs to be adjusted to be correct. This ensures a good signal to noise ratio, and should in general allow less need to heavily adjust the sliders.
In general, the input level should be set to -18 db. Most important is to have the input coming in near it's loudest volume it will likely be at during the event, otherwise this will not be set correctly.
On the display LEDs, this is the end of the green LEDs. To access this, click SEL on a channel. You can either hit the SEL button then on the CONFIG/PREAMP on the top left of the board to see the levels more clearly, or just turn the GAIN knob at the far top left of the board until the input level is where it needs to be.
Setting Sliders
Generally, sliders can be set at about 0db, or "unity", as the most fine tuned control is in this range. This is just a starting point though, and this is the place where most of your adjustments will be made.
Cleanup
- If using mics, please put them away.
- If you disconnected anything, please reconnect it.
- Turn off the main breaker on the rack.
- Cover the sound board back up.